Creating a new course in Moodle involves several steps, typically performed by users with administrator, manager, or course creator privileges. Here’s a step-by-step guide:
Step 1: Log in as an Administrator or Course Creator
- Ensure you have the necessary permissions to create courses.
Step 2: Access the Course Creation Page
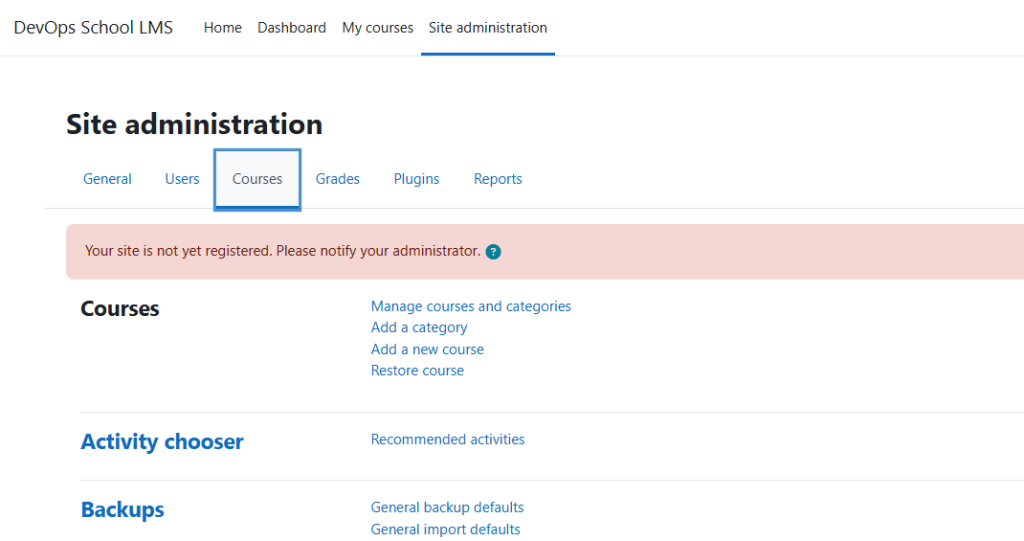
- Go to Site administration (from the left sidebar or the gear icon).
- Click on Courses > Manage courses and categories.
- Select the category where you want to add the new course (or create a new category first).
Step 3: Add a New Course
- Click Create new course.
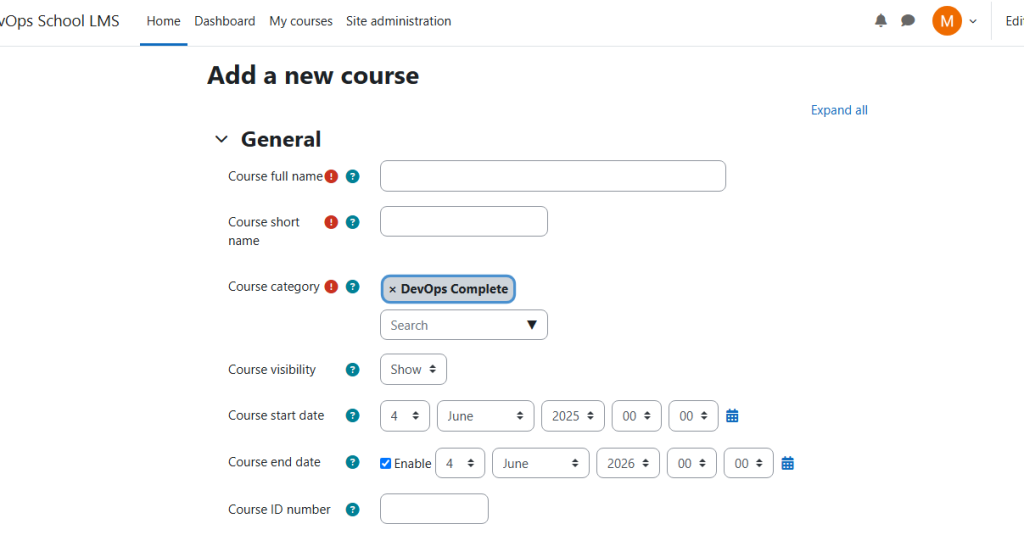
- Fill in the required details:
- Course full name (e.g., “Introduction to Python Programming”).
- Course short name (e.g., “PY101” – used for navigation).
- Course category (select from dropdown).
- Course summary (a brief description visible in course listings).
- Course format (Topics, Weekly, Social, etc.).
- Start and end dates (optional).
- Course ID number (optional, for external systems).
3. Click Save and display (or Save and return to go back to the course list).
Step 4: Configure Additional Course Settings (Optional)
After creation, you can further customize:
- Enrollment methods (e.g., manual, self-enrollment, guest access).
- Course completion settings (if tracking progress).
- Groups and groupings (if using collaborative features).
- Restrictions & access control (conditional availability).
Step 5: Add Content and Activities
- Click Turn editing on (top-right pencil icon).
- Use the “+ Add an activity or resource” button to add:
- Resources (Files, URLs, Pages).
- Activities (Assignments, Quizzes, Forums, etc.).
Step 6: Enroll Users
- Go to Course administration > Users > Enrolled users.
- Click Enroll users and select participants (students, teachers, etc.).