To create a virtual host in XAMPP, you need to follow these steps:
- Edit the Hosts File:
- Locate the hosts file on your system. Typically, it’s located at C:\Windows\System32\drivers\etc\hosts on Windows, or /etc/hosts on Linux.
- Open the hosts file with a text editor with administrative privileges.
- Add an entry for your virtual host. The format is 127.0.0.1 yourdomain.local. Replace yourdomain.local with the domain name you want to use for your virtual host.
2. Configure Apache:
- Navigate to your XAMPP installation directory and locate the httpd-vhosts.conf file. Typically, it’s located at C:\xampp\apache\conf\extra\httpd-vhosts.conf on Windows or /opt/lampp/etc/extra/httpd-vhosts.conf on Linux.
- Open httpd-vhosts.conf with a text editor.
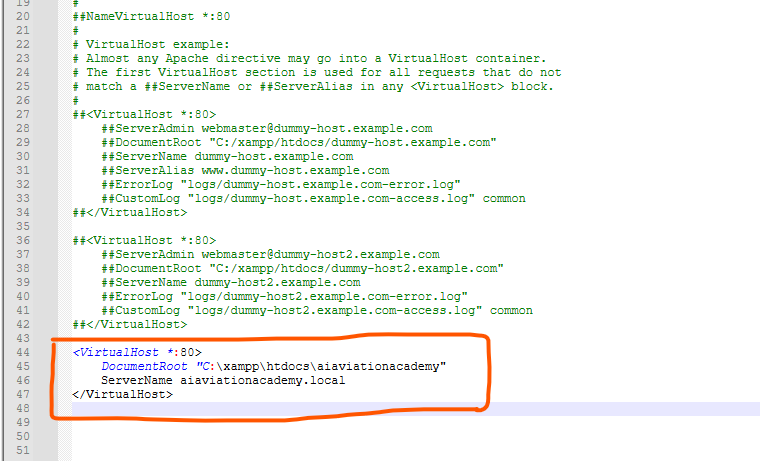
- Add a virtual host configuration. Here is an example:
<VirtualHost *:80>
    ServerAdmin webmaster@yourdomain.local
    DocumentRoot "C:/xampp/htdocs/yourprojectfolder"
    ServerName yourdomain.local
    ServerAlias www.yourdomain.local
    ErrorLog "logs/yourdomain.local-error.log"
    CustomLog "logs/yourdomain.local-access.log" common
</VirtualHost>
- Replace
yourdomain.localwith the domain name you specified in the hosts file. - Replace
"C:/xampp/htdocs/yourprojectfolder"with the path to the directory containing your project files. - You can also customize other settings like
ServerAdmin,ErrorLog, andCustomLogas needed.
3. Restart Apache:
- Open the XAMPP Control Panel.
- Stop Apache and then start it again to apply the changes.
4. Access Your Virtual Host:
- Open a web browser and navigate to
http://yourdomain.local.
Make sure that the directory specified in the DocumentRoot directive exists and contains your website files.
By following these steps, you should be able to set up a virtual host in XAMPP.