Android is a mobile operating system developed by Google. It is designed to run on a variety of devices such as smartphones, tablets, smartwatches, and televisions. It is based on the Linux kernel and is designed to provide a user-friendly and customizable experience for users. It was unveiled in November 2007, with the first commercial Android device, the HTC Dream, being launched in September 2008. Android allows developers to create applications using Java or Kotlin programming languages and distribute them through the Google Play Store.
What is top use cases of android ?
The top use cases of Android include:
1. Mobile Phones: Android powers the majority of smartphones worldwide, providing various functionalities such as calling, messaging, web browsing, and app installations.
2. Tablets: Android is also used on tablets, allowing users to enjoy a larger screen experience and productivity features like multi-window support.
3. Wearable Devices: Android Wear OS is used on smartwatches and other wearable devices, providing fitness tracking, notifications, and app integration.
4. Smart TVs and Streaming Devices: Android TV is a version of Android optimized for television screens, offering entertainment options, video streaming apps, and gaming.
What are feature of android ?
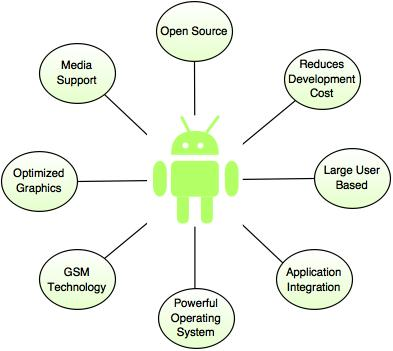
Some key features of Android include:
- Open-source: Android is an open-source operating system, which means that it is free to use and modify. This has allowed a large community of developers to create apps and other software for Android devices.
- Multitasking: Android supports multitasking, allowing users to switch between apps seamlessly.
- Customizability: Android allows users to personalize their devices with various themes, widgets, and app launchers.
- App Ecosystem: Android has a vast ecosystem of apps available on the Google Play Store.
- Google integration: Android seamlessly integrates with various Google services such as Gmail, Google Maps, and Google Drive.
- Connectivity: Android devices support various connectivity options like Wi-Fi, Bluetooth, NFC, etc.
- Security: Android devices are designed with security in mind. They have features such as encryption and malware protection to help keep users’ data safe.
What is the workflow of android ?
1. Application development: Developers setup tools & IDE and write code using programming languages such as Java or Kotlin to create Android applications.

2. Building the application: The code is compiled into a usable format, and additional resources such as images and layout files are included.
3. Testing: The application is tested for functionality, performance, and user experience.
4. Deployment: The application is packaged into an APK (Android application package) file and distributed through the Google Play Store or other platforms.

5. Installation and usage: Users download the app from the store and install it on their Android devices to use it.

How android Works & Architecture?
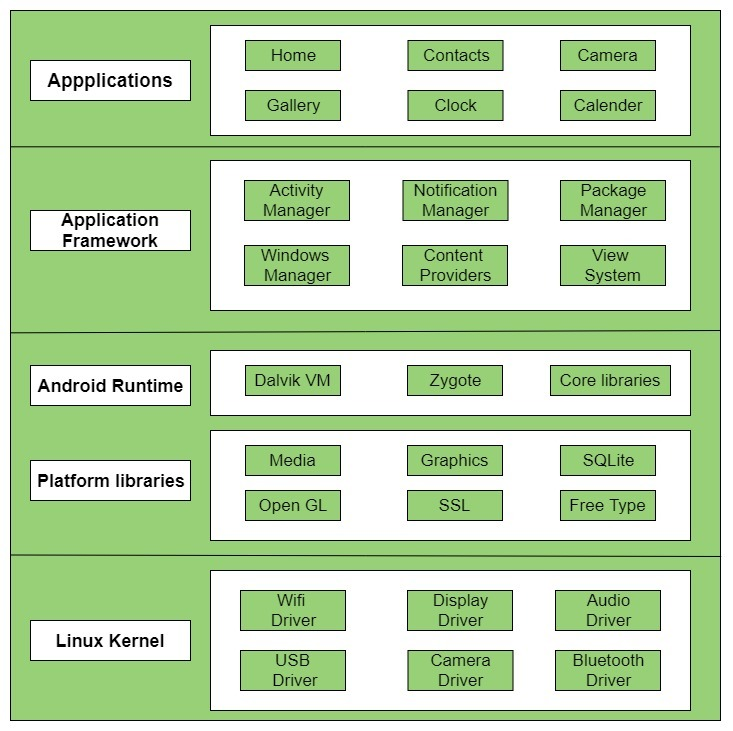
Android architecture consists of several layers, including:
1. Linux kernel: The core of the operating system that interacts with the device’s hardware.
2. Libraries and runtime environment: Libraries provide various functionalities, and the runtime environment allows the execution of Android applications.
3. Application framework: This layer provides high-level APIs for app development, including activities, services, content providers, and broadcast receivers.
4. Applications: The top layer consists of the user-facing applications developed for Android, such as messaging apps, games, and productivity tools.
How to Install and Configure android ?
System Requirements
- Microsoft Windows 7/8/10 (32-bit or 64-bit)
- 4 GB RAM minimum, 8 GB RAM recommended (plus 1 GB for the Android Emulator)
- 2 GB of available disk space minimum, 4 GB recommended (500 MB for IDE plus 1.5 GB for Android SDK and emulator system image)
- 1280 x 800 minimum screen resolution
To install and configure Android, here are some fundamental steps for windows:-
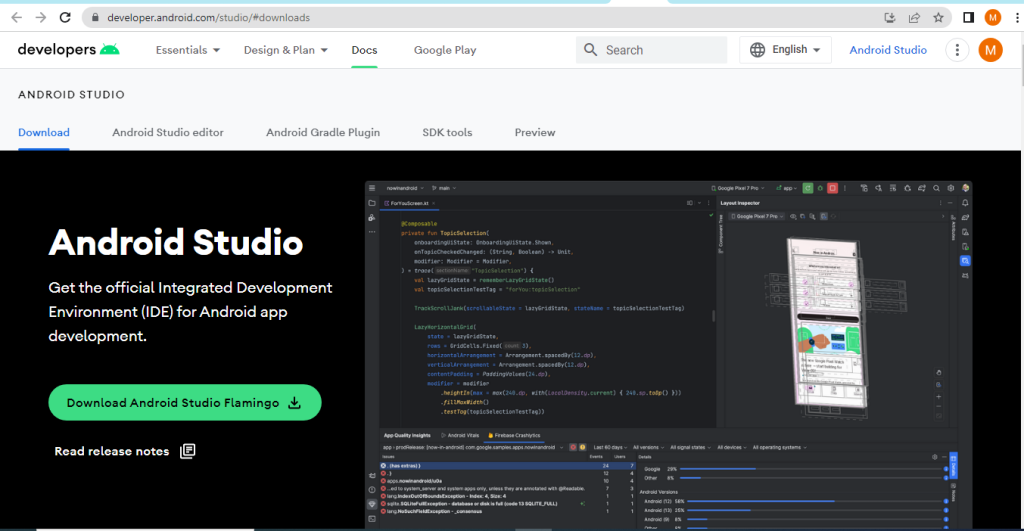
Step1: Open any browser and search or click https://developer.android.com/
Step 2: Click on the Download Android Studio Button.
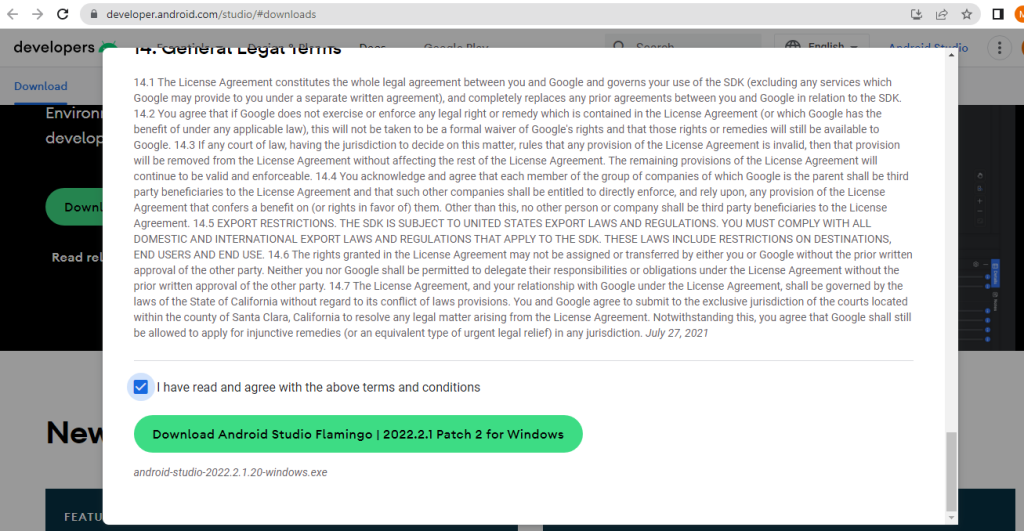
Check the box that says “I have read and agree to the terms and conditions,” then click the download button.
Step 3: After the download is complete, open the file from your downloads folder and run it. It will show the following dialog box.
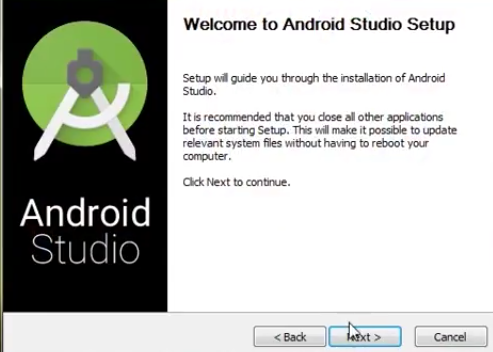
Click on next. In the next prompt, it’ll ask for a path for installation. Choose a path and hit next.
Step 4: It will start the installation, and once it is completed, it will be like the image shown below.
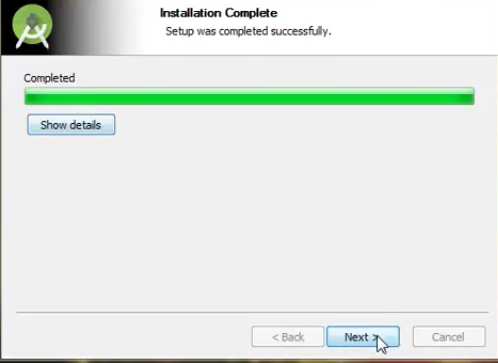
Click on next.
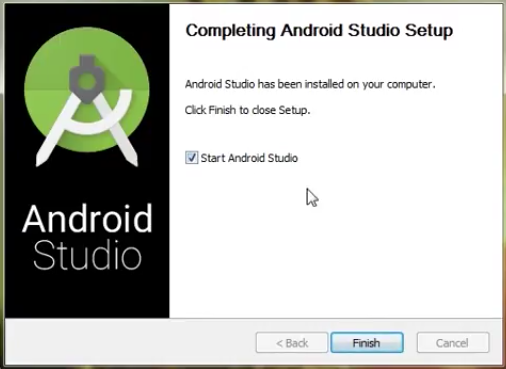
Step 5: After clicking “Finish,” you’ll be asked if you want to import previous settings from an earlier Android Studio installation. It’s recommended to choose the ‘Don’t import settings’ option.
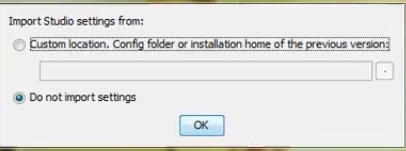
Click the OK button.
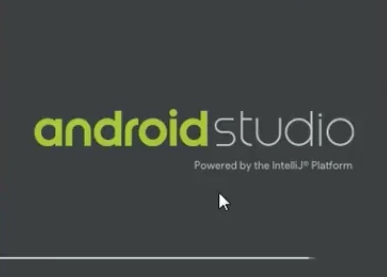
Step 6: This will start the Android Studio.
Meanwhile, it will be finding the available SDK components.

Step 7: After it has found the SDK components, it will redirect to the Welcome dialog box.
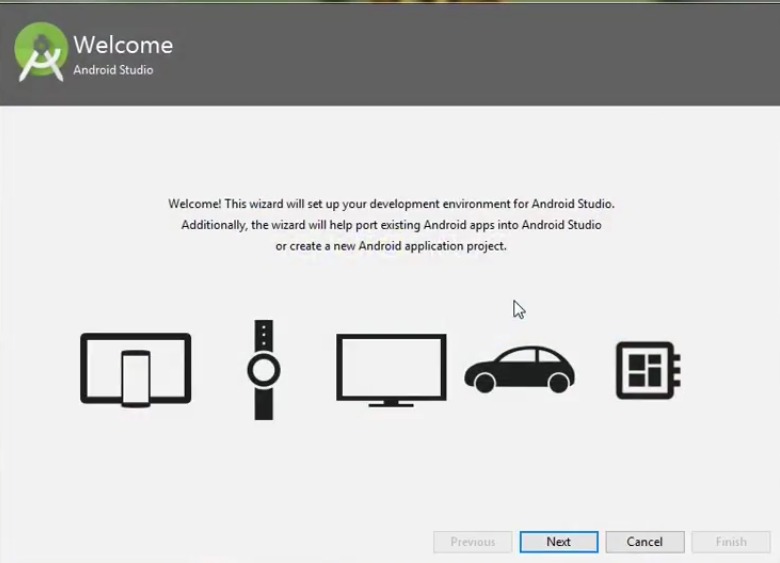
Click on Next.
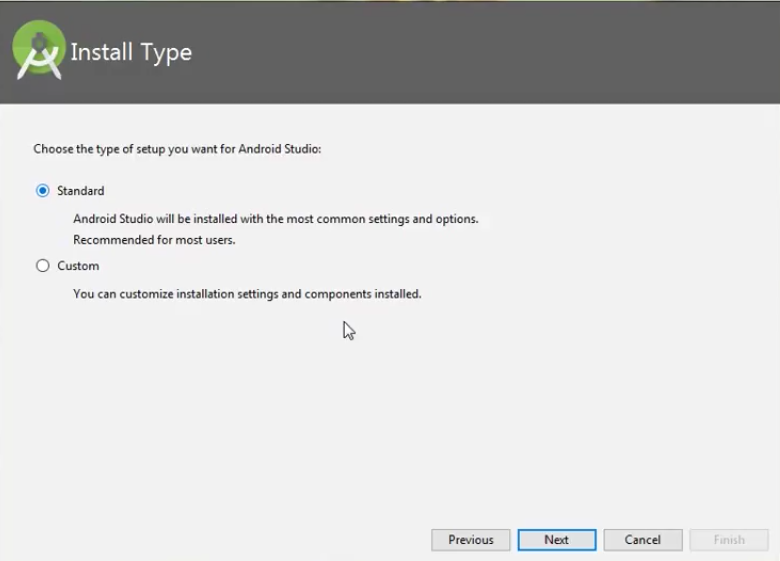
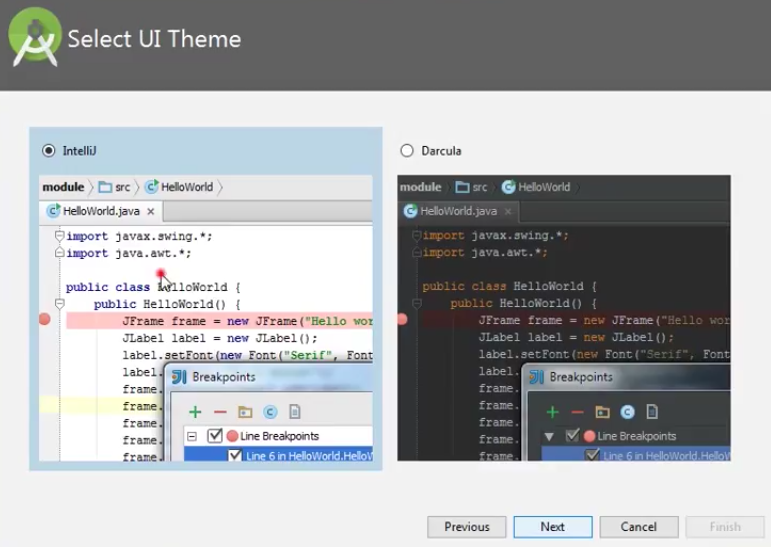
Click on “Standard” and then click “Next.” Now, select your preferred theme: either the Light theme (IntelliJ) or the Dark theme (Dracula). Choose the one you like.
Click on the Next button.
Step 8: Now it is time to download the SDK components.

Click on Finish. Components begin to download let it complete.
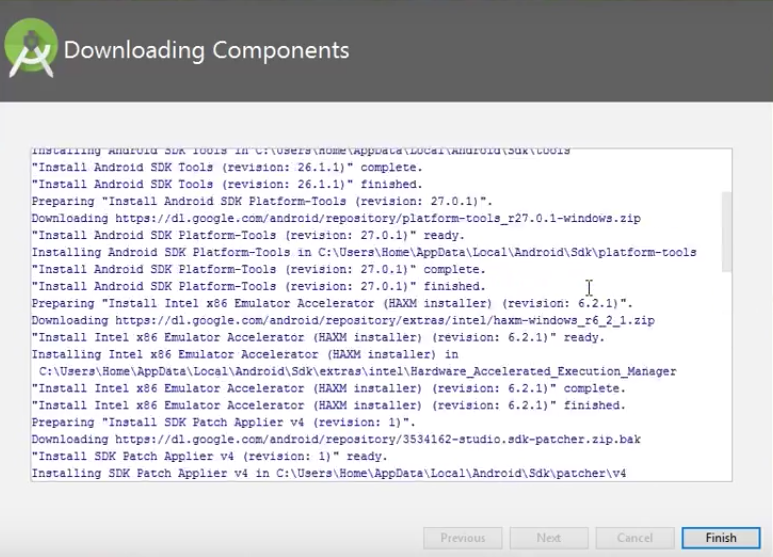
Android Studio has been configured successfully. Now, click the Finish button to launch it and start building apps.
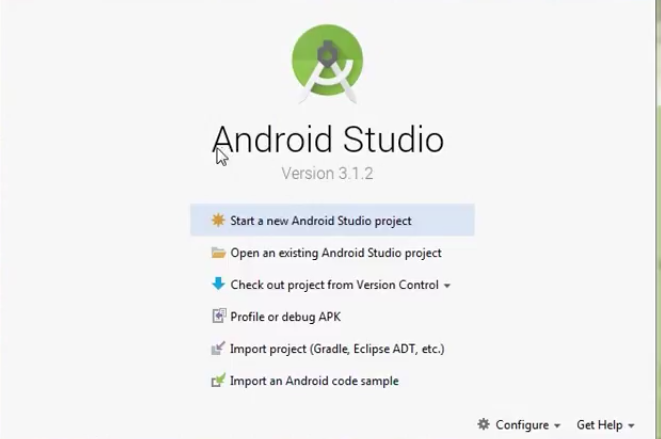
Step 9: Click on Start a new Android Studio project to build a new app.
Step by Step Fundamental Tutorials of android ?
Here, step-by-step tutorial to create a simple Android app that displays a “Hello, World!” message when a button is clicked. We’ll use Android Studio, which is the official Integrated Development Environment (IDE) for Android development.
Step 1: Install Android Studio
Download and install Android Studio from the official website: https://developer.android.com/studio
Step 2: Create a new Android Project
- Open Android Studio.
- Click on “Start a new Android Studio project” or go to File -> New -> New Project.
- Select “Empty Activity” and click “Next.”
- Choose a name for your project and set the package name (usually in reverse domain notation, like “com.example.myapp”).
- Choose the language (Java or Kotlin). For this tutorial, we’ll use Java.
- Choose the minimum API level (select a relatively new version for better device compatibility).
- Click “Finish” to create the project.
Step 3: Design the User Interface
- In Android Studio, open the
activity_main.xmlfile located in theres/layoutfolder. - Replace the existing code with the following XML code to create a simple layout:
<?xml version="1.0" encoding="utf-8"?>
<RelativeLayout
    xmlns:android="http://schemas.android.com/apk/res/android"
    xmlns:app="http://schemas.android.com/apk/res-auto"
    xmlns:tools="http://schemas.android.com/tools"
    android:layout_width="match_parent"
    android:layout_height="match_parent"
    tools:context=".MainActivity">

    <Button
        android:id="@+id/buttonClickMe"
        android:layout_width="wrap_content"
        android:layout_height="wrap_content"
        android:text="Click Me!"
        android:layout_centerInParent="true"
        android:padding="16dp"/>

    <TextView
        android:id="@+id/textHello"
        android:layout_width="wrap_content"
        android:layout_height="wrap_content"
        android:textSize="24sp"
        android:layout_below="@id/buttonClickMe"
        android:layout_centerHorizontal="true"
        android:padding="16dp"
        android:text="Hello, World!"/>

</RelativeLayout>
Step 4: Implement the Button Click
- Open the
MainActivity.javafile located in thejava/com.example.myappfolder. - Find the
onCreatemethod and add the following code inside it:
import android.os.Bundle;
import android.view.View;
import android.widget.Button;
import android.widget.TextView;

import androidx.appcompat.app.AppCompatActivity;

public class MainActivity extends AppCompatActivity {

    private Button buttonClickMe;
    private TextView textHello;

    @Override
    protected void onCreate(Bundle savedInstanceState) {
        super.onCreate(savedInstanceState);
        setContentView(R.layout.activity_main);

        buttonClickMe = findViewById(R.id.buttonClickMe);
        textHello = findViewById(R.id.textHello);

        buttonClickMe.setOnClickListener(new View.OnClickListener() {
            @Override
            public void onClick(View v) {
                textHello.setText("Hello, Android!");
            }
        });
    }
}
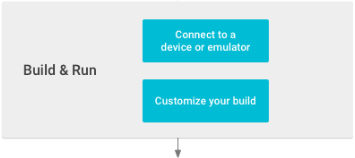
Step 5: Build and Run the App
- Connect your Android device to your computer or use an Android emulator.
- Click on the green “Run” button (or press Shift + F10) in Android Studio.
- Select your device from the list, and the app will be installed and launched on your device.
Congratulations! You’ve just created a simple Android app that displays “Hello, World!” when you click the “Click Me!” button.