
What is MySQL ?
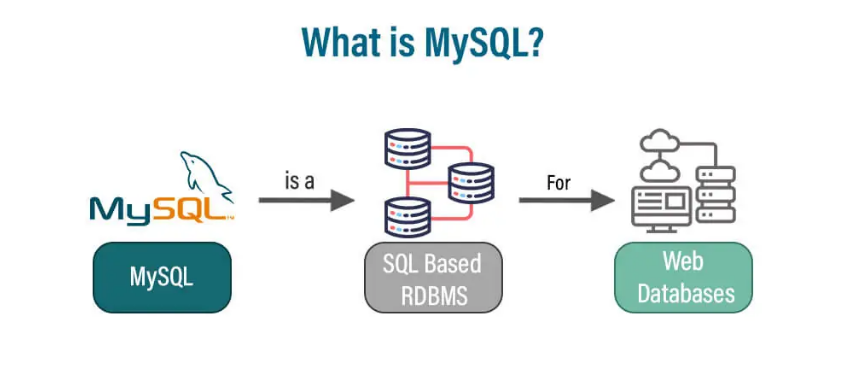
MySQL is a free and open-source relational database management system (RDBMS) that uses structured query language (SQL) for managing and manipulating databases.. It is one of the most popular RDBMSs in the world, known for its ease of use, high performance, and scalability. MySQL is used by a wide variety of websites and applications.
What is top use cases of MySQL ?
Some of the top use cases of MySQL include:
1. Web applications: MySQL is commonly used as the backend database for web applications due to its scalability, speed, and reliability.
2. Content management systems (CMS): Popular CMS platforms like WordPress, Joomla, and Drupal utilize MySQL to store and manage data.

3. E-commerce platforms: Many online stores utilize MySQL to handle product catalogs, inventory, and customer data.

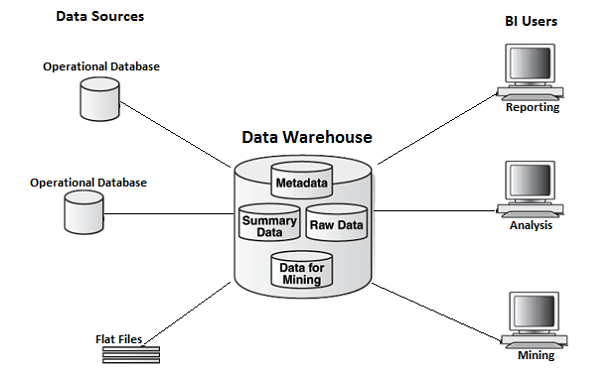
4. Data warehousing: MySQL can be used in conjunction with other tools to build data warehouses for business intelligence and analytics purposes.
5. Logging and analytics: MySQL is often used to store and analyze log data generated by applications, network devices, and servers.
What are feature of MySQL ?
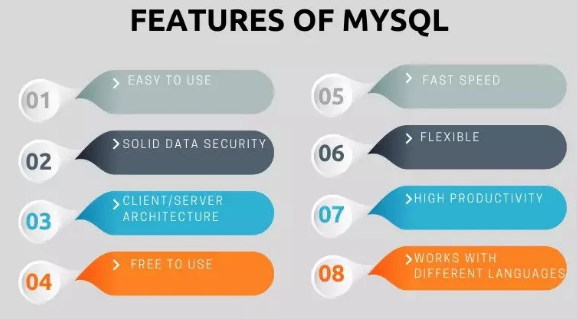
MySQL has a number of features that make it a popular choice for database management, including:
- Speed: MySQL is a very fast database, and can handle a high volume of queries.
- Reliability: MySQL is a reliable database, and is designed to handle large amounts of data and traffic.
- Scalability: MySQL is a scalable database, and can be easily scaled to meet the needs of growing applications.
- Security: MySQL is a secure database, and has a number of features to protect data from unauthorized access.
- Open source: MySQL is an open-source database, which means that it is free to use and modify.
What is the workflow of MySQL ?
MySQL follows a typical workflow that involves several steps to perform various operations. Here is a general overview of the MySQL workflow:
- Installation: Begin by installing MySQL on your system.
- Start MySQL Server: Start the MySQL server on your machine. It listens for client requests and manages databases.
- Connect to MySQL: Use a MySQL client (e.g., command-line client, GUI tool) to establish a connection with the MySQL server.
- Create Databases: Create one or more databases to store your data. Databases serve as containers for tables, views, indexes, etc.
- Design Tables: Define the structure of your data within each database by creating tables. Tables consist of rows and columns where data is stored.
- Insert Data: Populate the tables with data by executing INSERT statements. This step involves specifying the table and providing the values for each column.
- Retrieve Data: Use SELECT statements to retrieve data from one or more tables. You can apply filters, sorting, grouping, and more to retrieve specific data subsets.
- Update Data: Modify existing data in a table using the UPDATE statement. You can change values in specific rows and/or columns based on certain conditions.
- Delete Data: Remove unwanted data from tables using the DELETE statement. Similar to the UPDATE statement, you can specify conditions to selectively delete rows.
- Query Optimization: Analyze query performance using tools like EXPLAIN, and apply optimization techniques to enhance query execution time.
- Backup and Recovery: Create regular backups of your databases to prevent data loss. In case of any failures, you can restore the data from backups.
- Security Implementation: Implement security measures like setting strong passwords, user privileges, and access controls to protect your data from unauthorized access.
How MySQL Works & Architecture?
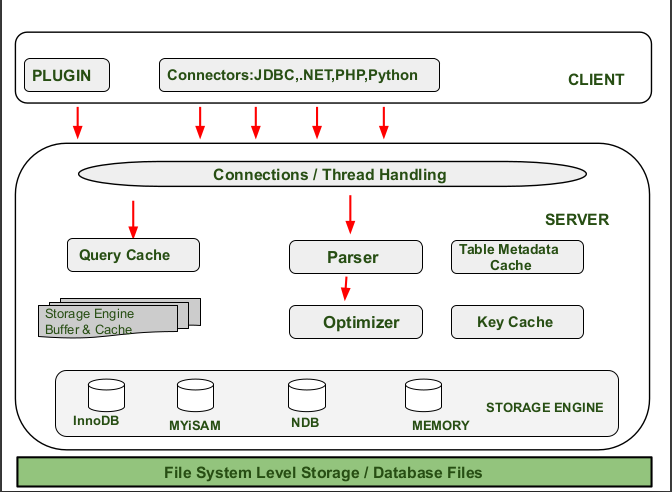
MySQL is a relational database management system (RDBMS) that follows the client-server model. This means that there are two main components: the client and the server. The client is the application that interacts with the database, and the server is the program that stores and manages the data.
The MySQL architecture is divided into three layers:
- The client layer is the interface between the user and the database. This layer is responsible for sending queries to the server and receiving the results. The client layer can be a command-line interface, a graphical user interface, or a programming language library.
- The server layer is the heart of the MySQL system. This layer is responsible for storing the data, processing queries, and managing the database. The server layer is also responsible for security, authentication, and authorization.
- The storage engine layer is responsible for storing the data on disk. MySQL supports a variety of storage engines, each with its own strengths and weaknesses. The most popular storage engine is InnoDB, which is designed for high performance and reliability.
When a client sends a query to the server, the server first parses the query to ensure that it is syntactically correct. The server then optimizes the query to improve performance. Once the query is optimized, the server sends it to the storage engine layer for execution. The storage engine layer reads the data from disk and returns the results to the server. The server then returns the results to the client.
The MySQL architecture is designed to be scalable and reliable. The server can be configured to handle a large number of concurrent connections, and the storage engines can be configured to store large amounts of data. MySQL is also designed to be highly available, with features such as replication and clustering.
Here is a diagram of the MySQL architecture:
Client Layer
  |
  |
  \/
Server Layer
  |
  |
  \/
Storage Engine Layer
The client layer is responsible for sending queries to the server and receiving the results. The server layer is responsible for storing the data, processing queries, and managing the database. The storage engine layer is responsible for storing the data on disk.
MySQL is a powerful and versatile database system that can be used for a wide variety of applications. It is a good choice for applications that require high performance, reliability, and scalability.
How to Install and Configure MySQL ?
To install and configure MySQL, you can follow these steps:
- Download MySQL: Visit the official MySQL website (https://dev.mysql.com/downloads/) and download the appropriate version for your operating system.
- Run the installer: Once the download is complete, run the installer and follow the installation wizard instructions.
- Choose setup type: During the installation, you will be prompted to select a setup type. Generally, you can choose the typical installation option unless you have specific requirements.
- Configure MySQL Server: After the installation is complete, you will be prompted to configure the MySQL server. Provide a root password for the MySQL server and choose the configuration that suits your needs. You can also choose to run MySQL as a service, enabling it to start automatically.
- Complete the installation: Follow the remaining instructions to complete the installation process. Once finished, MySQL should be installed and running on your system.
- Verify the installation: Open a terminal or command prompt and type
mysql -Vto check the MySQL version. If it displays the version number, MySQL is installed correctly. - Configure MySQL Connection: To connect to the MySQL server, you will need a client tool such as MySQL Workbench or the MySQL command line interface. Install the client tool and configure it to connect to your MySQL server by providing the server address, username, password, and port number.
That’s it! You have successfully installed and configured MySQL on your system. You can now start creating databases and working with MySQL.
Fundamentals of creating a database in MySQL
MySQL is a popular open-source relational database management system (RDBMS) that is widely used for storing and managing data. In this article, we will walk through the process of creating a database in MySQL step by step. We will provide examples and explanations along the way to help you understand the concepts better.
Step 1: Installing MySQL
Before we can start creating a database in MySQL, we need to have MySQL installed on our system. If you haven’t already done so, you can download and install MySQL from the official website here.
Step 2: Starting MySQL Server
Once MySQL is installed, we need to start the MySQL server. This can typically be done by running the following command in the terminal:
mysql.server start
Step 3: Accessing MySQL Shell
To interact with MySQL, we will use the MySQL shell. Open a terminal window and enter the following command to access the MySQL shell:
mysql -u root -p
You will be prompted to enter the password for the root user. Enter the password and press Enter to proceed.
Step 4: Creating a Database
Now that we are in the MySQL shell, we can start creating our database. To create a database, use the following command:
CREATE DATABASE mydatabase;
Replace “mydatabase” with the desired name for your database. Make sure to avoid using spaces or special characters in the database name.
Step 5: Selecting the Database
After creating the database, we need to select it before we can perform any operations on it. To select a database, use the following command:
USE mydatabase;
Replace “mydatabase” with the name of your database.
Step 6: Creating Tables
Tables are used to store data in a structured manner within a database. To create a table, we need to define its structure, including the column names and data types. Here’s an example of how to create a table:
CREATE TABLE customers (
  id INT PRIMARY KEY AUTO_INCREMENT,
  name VARCHAR(50),
  email VARCHAR(100),
  age INT
);
This creates a table called “customers” with four columns: “id”, “name”, “email”, and “age”. The “id” column is the primary key, which will automatically generate a unique value for each row.
Step 7: Inserting Data into Tables
Once the table is created, we can start inserting data into it. To insert data into a table, use the following command:
INSERT INTO customers (name, email, age) VALUES ('John Doe', 'johndoe@example.com', 30);
This inserts a new row into the “customers” table with the provided values for the “name”, “email”, and “age” columns.
Step 8: Retrieving Data from Tables
To retrieve data from a table, we can use the SELECT statement. Here’s an example:
SELECT * FROM customers;
This selects all rows and columns from the “customers” table and returns the result.