What is iOS ?
iOS is a mobile operating system developed by Apple Inc. It is the software that runs on iPhones, iPads, and iPod Touch devices. It is the second most popular mobile operating system in the world, after Android. iOS is based on the Unix operating system and uses the same kernel.
What is top use cases of iOS?
Some of the top use cases of iOS include:
1. Communication: iOS devices are widely used for messaging, video calling, and email.
2. Entertainment: Users can enjoy various forms of media like music, movies, and games on iOS devices.
3. Productivity: iOS offers a range of productivity apps for tasks like document editing, note-taking, and task management.
4. E-commerce: iOS devices are commonly used for online shopping and accessing e-commerce apps.
5. Social Media: iOS supports popular social media platforms, allowing users to connect and share content.
What are feature of ios?
Features of iOS:
- Touch-based interface: iOS devices use a touch-based interface, which makes them easy to use.
- Multitasking: iOS devices can run multiple apps at the same time.
- App Store: The App Store is a great resource for finding and downloading apps.
- Security: iOS is a very secure operating system.
- Ease of use: iOS is easy to use, even for beginners.
What is the workflow of ios?
The workflow of iOS is the process of developing and deploying iOS apps. It typically involves the following steps:
- Design and planning: This involves defining the app’s features, user interface, and overall architecture.
- Coding: This involves writing the app’s code in Swift or Objective-C.
- Testing: This involves testing the app for functionality, performance, and compatibility.
- Deployment: This involves submitting the app to the App Store for review and distribution.
How iOS Works & Architecture?

The architecture of iOS is divided into three layers:
- Core OS layer: Provides low-level functionalities such as memory management, security, and basic hardware interaction.
2. Core Services layer: Offers essential services like networking, file handling, and concurrency.
3. Media layer: Handles audio, video, graphics, and animation-related tasks. – Cocoa Touch layer: Provides a user interface framework that enables the development of iOS applications.
How to Install and Configure ios?
Steps to Install iOS
Installation of iOS are as follow:
Step 1: To install the iOS version (regular or test), simply go to “Software Update” on your iPhone or iPad.
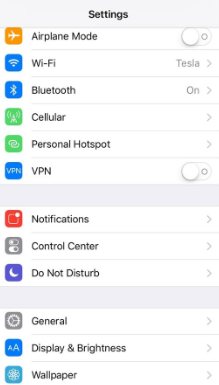
Step 2: Open the Settings app from your home screen, tap on General, and then select Software Update.

Step 3: Once you are able to see the update, tap on Download and install
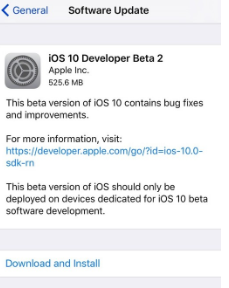
Step 4: Enter the passcode.

Step 5: Tap Agree to agree and continue.
Step 6: Tap Agree again to confirm.
Step by Step Tutorials for ios for hello world program
Here is a step-by-step tutorial to create a simple “Hello, World!” program for iOS using Swift and Xcode.
Step 1: Install Xcode If you haven’t already, download and install Xcode from the Mac App Store. Xcode is the official development environment for iOS apps.
Step 2: Create a New Project Open Xcode, and follow these steps to create a new iOS project:
- Click on “Create a new Xcode project” or go to “File” > “New” > “Project…”.
- Select “iOS App” as the project template and click “Next.”
- Choose a product name (e.g., “HelloWorldApp”), organization name, and organization identifier (a reverse-domain-style string, like “com.yourcompany”).
- Choose a location to save your project and click “Create.”
Step 3: Set Up Project Options In the project settings, you can choose deployment target, language, and user interface. For this tutorial, we will use Swift as the language and the latest iOS version as the deployment target.
- In the project navigator (on the left side of Xcode), select the top-level project.
- In the “Signing & Capabilities” tab, ensure that “Automatically manage signing” is enabled.
- In the “General” tab, set the “Deployment Info” to the latest iOS version.
- Close the project settings.
Step 4: Design the User Interface (Optional) For this simple “Hello, World!” program, we won’t need a complex user interface. However, you can add one if you want.
- In the project navigator, open the “Main.storyboard” file.
- Drag a “Label” from the Object Library (lower-right corner) to the View Controller scene.
- Customize the label’s text and appearance, as desired.
Step 5: Add Code to Display “Hello, World!” Now, let’s write the Swift code to display “Hello, World!” on the screen.
- In the project navigator, open the “ViewController.swift” file.
- Find the
viewDidLoadmethod, which is called when the view loads. - Replace its content with the following code:
import UIKit

class ViewController: UIViewController {
    override func viewDidLoad() {
        super.viewDidLoad()
        let helloLabel = UILabel(frame: CGRect(x: 0, y: 0, width: 200, height: 50))
        helloLabel.center = view.center
        helloLabel.textAlignment = .center
        helloLabel.text = "Hello, World!"
        view.addSubview(helloLabel)
    }
}
Step 6: Run the App Now, you’re ready to see your “Hello, World!” app in action.
- Connect your iOS device to your Mac or use the iOS simulator.
- In Xcode, select your device (or the simulator) from the device dropdown menu, near the “Run” button.
- Click on the “Run” button (a play icon) or use the shortcut “Command + R”.
- The app will be built and installed on your device or simulator. You should see the “Hello, World!” message displayed on the screen.
Congratulations! You have created your first iOS app with a “Hello, World!” message.
[…] What is iOS and How iOS Works & Architecture? […]