Upgrade & Secure Your Future with DevOps, SRE, DevSecOps, MLOps!

We spend hours on Instagram and YouTube and waste money on coffee and fast food, but won’t spend 30 minutes a day learning skills to boost our careers.
Master in DevOps, SRE, DevSecOps & MLOps!

Learn from Guru Rajesh Kumar and double your salary in just one year.

Get Started Now!

Step-by-Step Guide: Changing Your WordPress Admin Password in XAMPP Local Development Environment

To change the WordPress admin panel password in a local XAMPP environment, you can follow these steps:

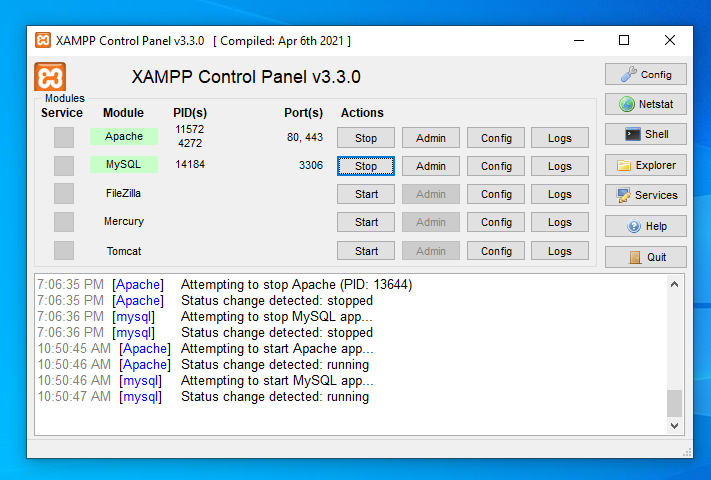
  1. Access phpMyAdmin: Open your web browser and go to http://localhost/phpmyadmin or wherever you’ve installed phpMyAdmin in your XAMPP setup.

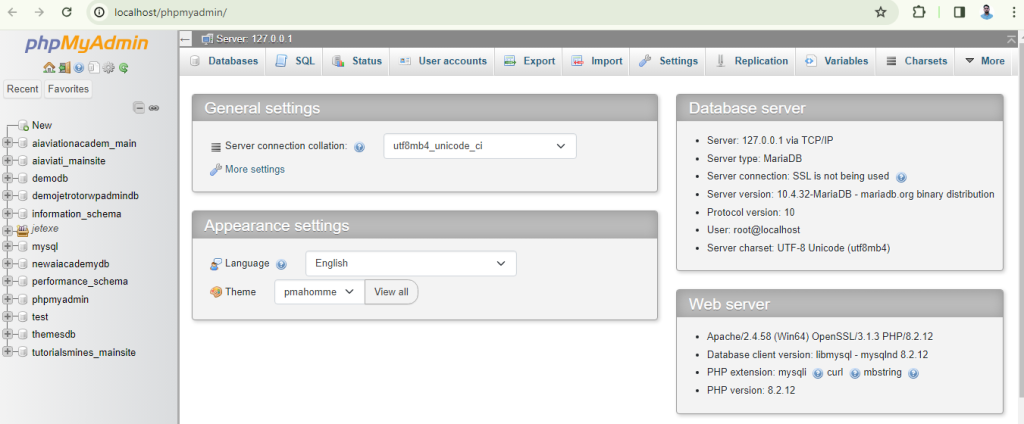
2. Login to phpMyAdmin: Use the username and password you’ve set up for your MySQL database in XAMPP.

3. Select your WordPress database: On the left-hand side of phpMyAdmin, you’ll see a list of databases. Click on the one associated with your WordPress installation. The name is usually something like wordpress or wp.

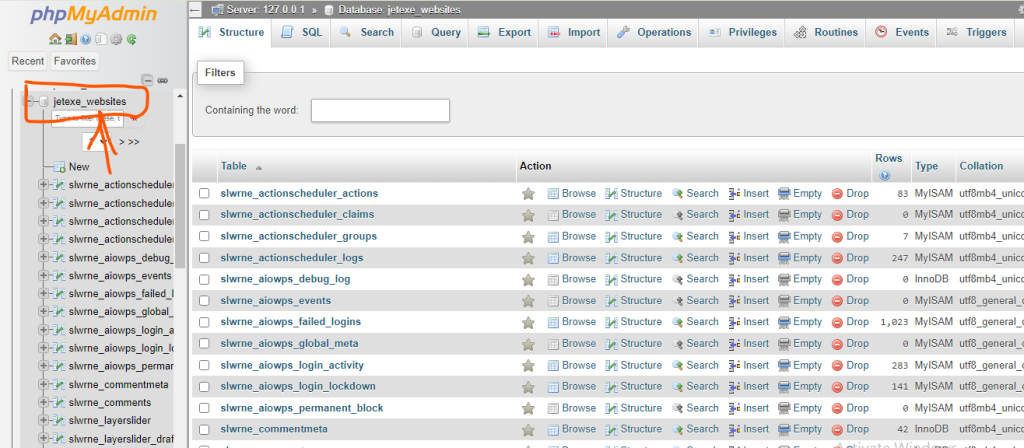
4. Find the wp_users table: WordPress stores user information in a table named something like wp_users. Click on it to open it.

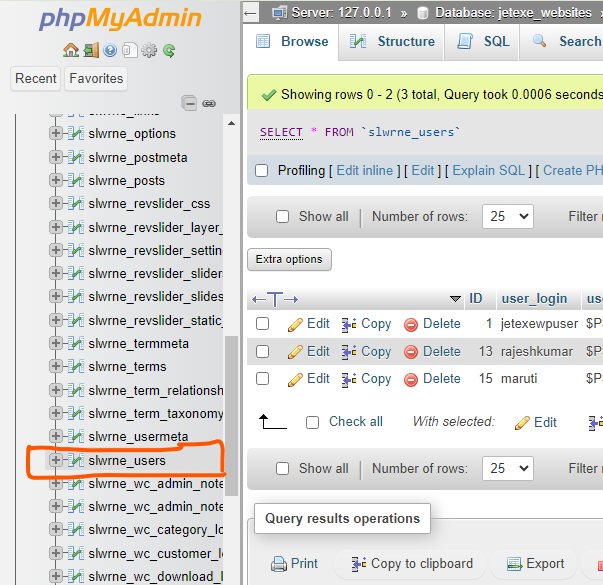
5. Locate your admin user: In the wp_users table, you’ll see a list of users. Look for the row where the user_login column has the value of your WordPress admin username (usually “admin” by default).

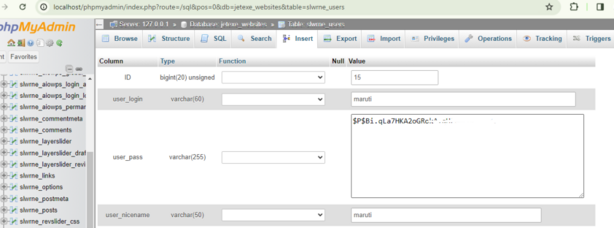
6. Change the password: In the row corresponding to your admin user, find the user_pass column. Click on the pencil icon or “Edit” button to edit the password. You’ll need to enter the new password in a specific format.

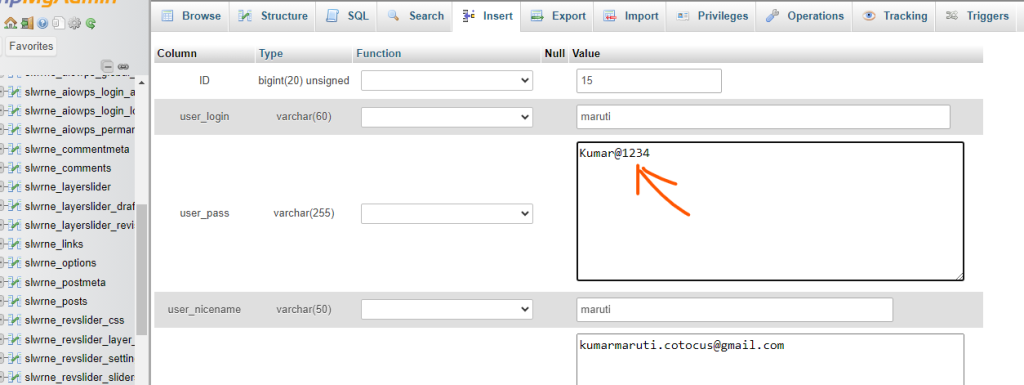
7. Generate a new password hash: WordPress stores passwords in a hashed format for security. You can’t just enter the password directly into the user_pass field. You need to generate a hash of the password using MD5 or another encryption method. You can use an online MD5 hash generator or a command-line tool to generate the hash. For example, if you want to set the password to “newpassword”, you can use an MD5 hash generator to generate the hash of “newpassword”, and then paste the hash into the user_pass field.

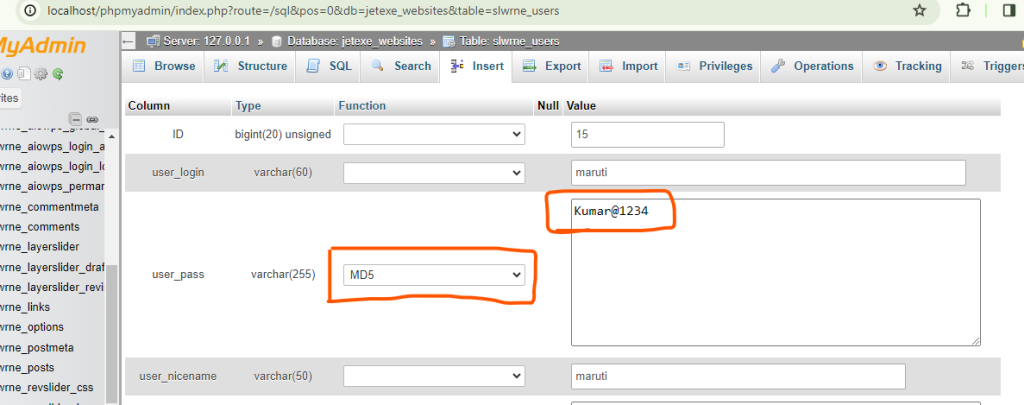
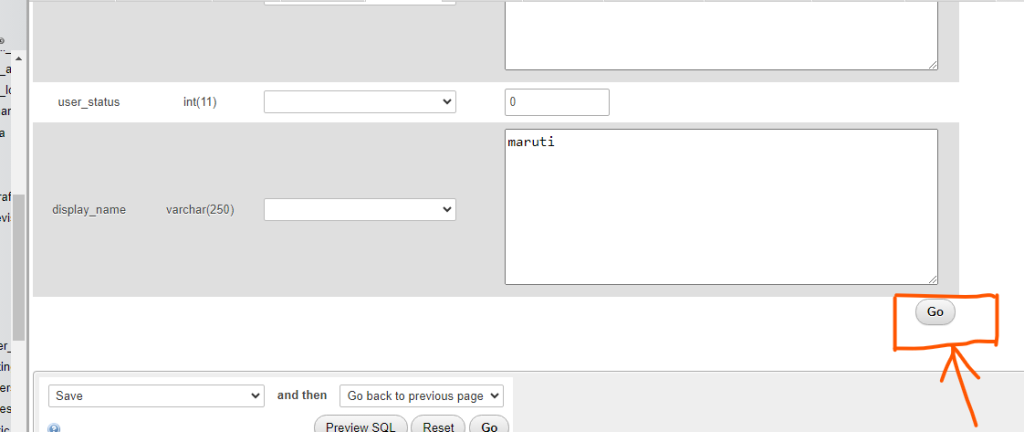
7. Save the changes: After pasting the hashed password into the user_pass field, save your changes by clicking the “Go” button or the equivalent in phpMyAdmin.

8. Test the new password: Now you can go to your WordPress login page (usually http://localhost/wordpress/wp-admin/) and try logging in with the new password.

By following these steps, you should be able to change the WordPress admin panel password in your local XAMPP environment. Make sure to keep your password secure and avoid using weak passwords for better security.

Related Posts

How to Install and Enable GMP Extension in XAMPP PHP on Linux (Step-by-Step Guide)

Introduction If you are using XAMPP PHP on a Linux server and encounter errors like: then this usually means the GMP extension is not installed, not just Read More

Read More

Error : MySQL shutdown unexpectedly. This may be due to a blocked port, missing dependencies , improper privileges, a crash, or a shutdown by another method.

Step 1: First, stop Apache and MySQL in the XAMPP server, then go to C:\xampp\mysql and back up the data folder. Step 2: After backing up the Read More

Read More

You probably tried to upload a file that is too large. Please refer to documentation for a workaround for this limit.

For Upload large size data in using phpmyadmin Do following steps. than after restart wamp server or restart all services Now Upload data using import function in Read More

Read More

phpMyAdmin Troubleshooting Advance Guides

Here are some advanced troubleshooting guides for PHPMyAdmin: 1. Performance Issues Slow Loading Times: 2. Connection Issues Error Messages like “Access Denied for User”: 3. Session Timeout Read More

Read More

ERROR 1153 (08S01) at line 1582: Got a packet bigger than ‘max_allowed_packet’ bytes

When I’m trying to add a big file to my WordPress phpmyadmin database, I keep getting errors like this:- ERROR 1153 (08S01) at line 1582: Got a Read More

Read More

Setting Up Virtual Hosts in XAMPP for Windows: A Step-by-Step Guide

To create a virtual host in XAMPP, you need to follow these steps: 2. Configure Apache: 3. Restart Apache: 4. Access Your Virtual Host: Make sure that Read More

Read More
Subscribe
Notify of
guest
0 Comments
Oldest
Newest Most Voted
Inline Feedbacks
View all comments
0
Would love your thoughts, please comment.x
()
x