Setting up and managing course multimedia and video resources in Moodle involves a few steps. Here’s a guide to help you through the process:
1. Enable Multimedia Plugins
Before adding multimedia resources, ensure that Moodle has the necessary plugins enabled for handling multimedia content like audio, video, and images.
- Go to Site administration > Plugins > Manage activities.
- Ensure that plugins like Multimedia Plugins are enabled.
Moodle also supports embedding videos and images from external services like YouTube, Vimeo, etc. These features can typically be enabled through the Text editor (the Atto editor).
2. Adding Video Files to Moodle
You can upload video files to your Moodle course using several methods:
Method 1: Uploading Video Files Directly
- Go to your course and turn on Editing by clicking the “Turn editing on” button.
- In the section where you want to add a video, click Add an activity or resource.
- Choose File and click Add.
- In the File settings section, click the Add button under the Content section.
- Choose the video file from your computer and upload it.
- In the Display options section, you can set how you want the video to be displayed (inline, embedded, or downloadable).
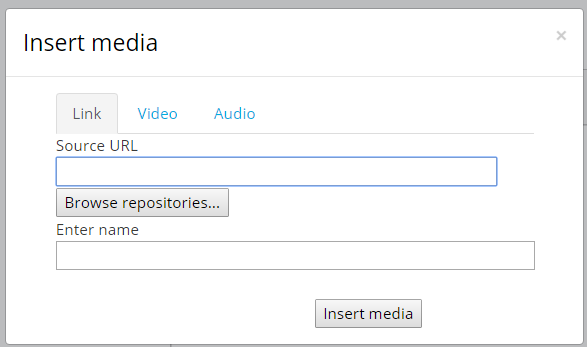
Method 2: Embedding Video from External Services (YouTube, Vimeo, etc.)
- In the Text editor (Atto editor), click the Insert or edit an audio/video button (icon that looks like a film strip).
- Paste the URL of the video (YouTube, Vimeo, etc.).
- Set the size and other settings as needed and click Insert.
- This will embed the video directly into the course.
3. Embedding and Managing Other Multimedia Resources
Method 1: Adding Audio Files
- Just like video, you can upload audio files by selecting the File option in the “Add an activity or resource” screen.
- Use the Insert or edit audio button in the text editor to embed audio files directly in the course content.
Method 2: Adding Image Resources
- To add images, click the Add an activity or resource button and select File or use the Image button in the text editor.
- Upload your image file or paste an image URL.
4. Embedding Multimedia Content in Moodle Activities
You can add multimedia resources inside Moodle activities like Assignments, Quizzes, or Forums by embedding or uploading the content directly into the activity description or via the text editor. For instance:
- For Assignments: When setting up an assignment, you can add instructions with embedded videos, images, or audio.
- For Quizzes: In the quiz questions, you can embed media to support the questions.
- For Forums: You can include multimedia content in forum posts.
5. Using Moodle’s Video Player
Moodle has a built-in video player to handle various video formats (e.g., MP4, WebM, etc.). When you upload a video, Moodle will automatically use its player to render the video. However, you can adjust settings to enhance how the player behaves:
- Automatic resizing: Set video to resize based on device type.
- Autoplay: Enable autoplay for video files.
- Subtitles: If your video has subtitles, you can upload the subtitle files.
6. Managing Course Multimedia (Video and Audio Files)
Moodle also provides options to manage and organize media files in your course:
- Repository System: Use Moodle’s repository system to store and access multimedia content. You can upload files to your Course Files or link to files stored in external repositories.
- Organize by Folders: You can use folders to organize multimedia content for easy access by students.
- Create a Folder: In your course, click Add an activity or resource > Folder and upload your multimedia content into the folder.
7. Use Moodle’s Streaming Options
Moodle also allows for integration with external video hosting platforms like YouTube, Vimeo, and others. You can embed or link these platforms for better video management and streaming quality. This is particularly helpful for large videos where hosting them on Moodle may not be ideal.
8. Video Streaming with BigBlueButton (For Live Sessions)
If you plan on using live video content, you can integrate BigBlueButton, which allows you to conduct live video sessions, record them, and embed them in Moodle. You can:
- Schedule live sessions.
- Upload and stream recorded sessions directly in Moodle.
9. Monitoring and Adjusting Permissions
Ensure your students have the correct permissions to view the multimedia content you’ve added. You can control:
- Visibility: Set the visibility of the video or multimedia file to be either visible or hidden based on your course schedule.
- Download Options: Enable or disable the option to download the files.
- Access Control: Set restrictions based on student groupings, course progress, or date/time.
10. Testing and Troubleshooting
Once you’ve uploaded your multimedia content, test it by viewing the course as a student. Check:
- Video playback: Ensure videos load and play correctly.
- Audio quality: Ensure audio content is clear.
- File access: Verify that all multimedia files are accessible to students.
By following these steps, you can successfully set up, manage, and organize multimedia and video content in Moodle, making your course more engaging and interactive.