Integrating external tools and plugins with Moodle can significantly enhance the functionality of your Moodle platform. Below are the general steps to integrate external tools and plugins with Moodle:
1. Using Moodle Plugins
Moodle has a wide range of plugins available for various functionalities, including activities, themes, authentication methods, etc. To integrate these plugins:
Steps:
- Find the Plugin:
- Go to the Moodle Plugin Directory to find the plugin you want to integrate.
- Download the Plugin:
- Download the plugin package (usually a
.zipfile).
- Download the plugin package (usually a
- Upload the Plugin to Moodle:
- Log in to your Moodle site as an administrator.
- Navigate to Site administration > Plugins > Install plugins.
- Upload the downloaded plugin
.zipfile using the “Install plugin from the zip file” option.
- Configure the Plugin:
- After installation, go to Site administration > Plugins and configure the plugin settings according to your requirements.
- Some plugins may require additional configuration or setup before they work properly.
- Test the Plugin:
- Once configured, test the plugin to ensure it functions correctly and integrates well with other parts of the platform.
2. Integrating External Tools (LTI)
If you’re looking to integrate external tools (e.g., third-party applications, external learning tools) into Moodle, you can use the LTI (Learning Tools Interoperability) integration. This allows Moodle to connect with other platforms and tools via standards-based protocols.
Steps:
- Enable LTI in Moodle:
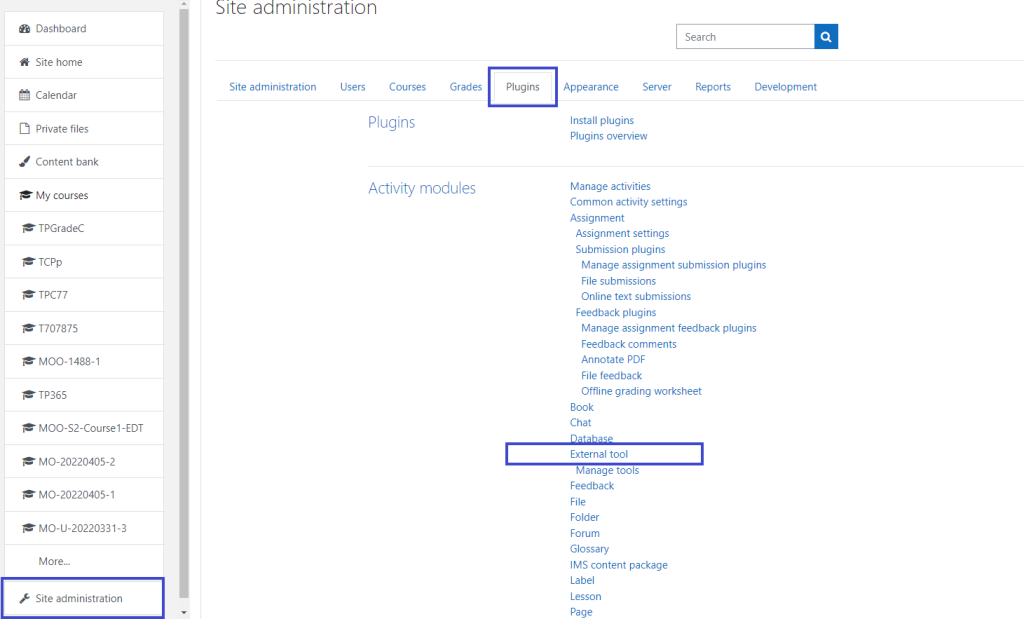
- Navigate to Site administration > Plugins > Activity modules > External tool.
- Ensure the External tool settings are properly configured (e.g., enable LTI 1.1 or LTI 1.3, depending on the external tool you’re using).
- Create an External Tool Activity:
- In the course where you want to add the external tool, click on Add an activity or resource.
- Select External tool from the list.
- Configure the External Tool Settings:
- Enter a name and description for the external tool activity.
- Configure the Tool URL, Consumer key, and Shared secret (provided by the external tool you’re integrating).
- Optionally, you can also set up other parameters based on the external tool’s documentation (e.g., custom parameters, privacy settings, etc.).
- Test the Tool:
- After configuring the external tool, save and test it in the course to make sure it works seamlessly.
3. Web Services Integration (for APIs)
If you’re looking to connect Moodle with external systems or tools that expose an API, you can use Moodle Web Services. This allows external applications to communicate with Moodle using HTTP-based API calls (REST, SOAP, XML-RPC).
Steps:
- Enable Web Services:
- Navigate to Site administration > Advanced features and ensure that Web services are enabled.
- Create a Web Service User:
- Go to Site administration > Users > Accounts > Add a new user to create a new user for API access.
- Create a Web Service:
- Navigate to Site administration > Web services > External services.
- Add a new external service and configure the functions (API calls) that you want to expose.
- Generate a Token:
- After setting up the web service, generate an access token for the user you created earlier. This token is used for authenticating API requests.
- Make API Requests:
- Using the generated token, external systems can now make requests to Moodle’s API (e.g., retrieve course data, enroll users, etc.).
4. Custom Development for Deep Integration
For advanced custom integration, you may need to develop a Moodle local plugin or block plugin. This is useful if you need to create a more tailored integration that cannot be achieved through existing plugins or APIs.
Steps:
- Develop a Local Plugin or Block Plugin:
- Develop your custom plugin using Moodle’s plugin development guidelines. You’ll need knowledge of PHP, SQL, and Moodle’s API.
- Install the Custom Plugin:
- Once your plugin is developed, install it like any other plugin by uploading it to the appropriate directory in Moodle (
/localfor local plugins,/blocksfor block plugins).
- Once your plugin is developed, install it like any other plugin by uploading it to the appropriate directory in Moodle (
- Test and Debug:
- Test your custom integration thoroughly and debug it to ensure everything is working correctly.
5. Other Integration Options:
- Single Sign-On (SSO): You can integrate Moodle with an external identity provider using protocols like SAML2 or OAuth2.
- Video Conferencing Tools: Tools like Zoom, BigBlueButton, and Google Meet can be integrated with Moodle through respective plugins.
- Gradebook Integrations: Tools like Turnitin and SafeAssign can be integrated for plagiarism detection and grading.
Conclusion
Integrating external tools and plugins into Moodle is a flexible and scalable process. Whether you’re adding third-party tools via LTI, using web services for API integrations, or installing pre-built plugins, Moodle supports a variety of integration methods to enhance its capabilities. For custom solutions, developing a local plugin or block plugin may be the best approach. Always ensure you thoroughly test the integration before deployment.